
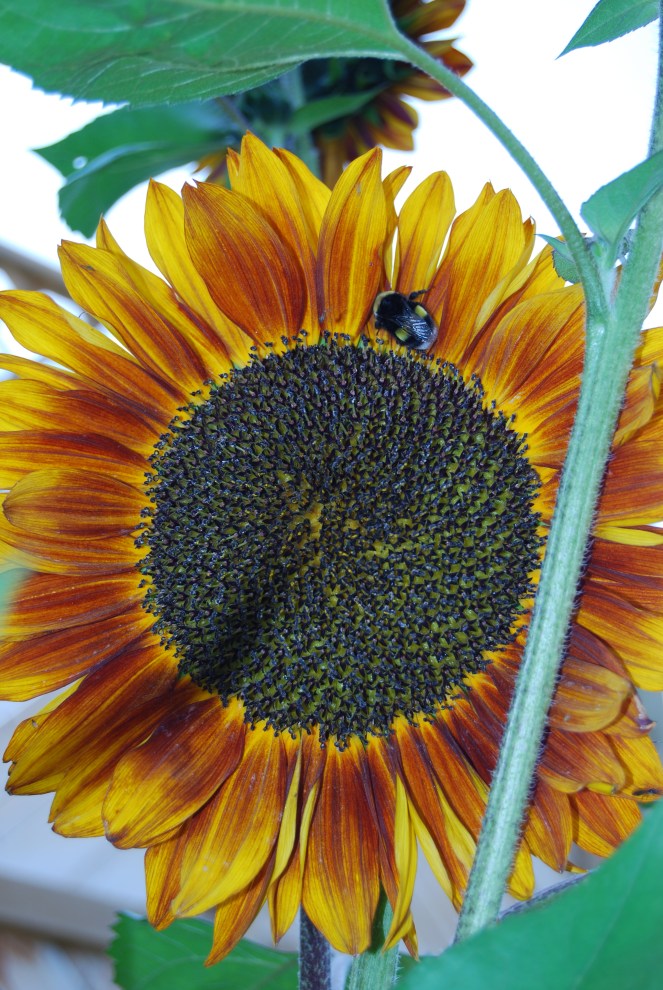
With a majestic height reaching to the sun, and a thick hairy stem that is often over looked, this is a stalk that’s size is such that stories that shame Jack and the Beanstalk live in its branches. However, people’s eyes travel up past the healthy shoots of triangular toothed shaped leaves to the flower head at the end of the branch. It is a large round show stealer with a brown pocked center that is dusted with a pollen yellow. Pointed oval shaped petals encircle the center. The petal itself is rippled with waves. Its colour variegated: yellow, yellow-orange, orange, red-orange, and back again.
My harvest of sunflower seeds from the year before was bountiful. I had way more than I could plant and use for bird food. As I stood looking at the abundance of light brown tear drop shaped seeds, intermixed with long thin black and red tinged seeds an idea struck me. My boys love planting with me, surely other kids would enjoy planting and nurturing a seed as well? Why not see if the kindergarten class could make use of the seeds?
First, I asked my son if he would like to share an activity with his class, and he loved the idea. Next, we hunted around for supplies before pitching the idea to his teacher. Once we had collected our supplies the pitch to the teacher include 3 components: a show-and-tell of seedlings, a show-and-tell of seeds, and the sunflower planting activity.
We included some seedlings, at an early stage of growth, for the class to view. These seedlings included: carrot, beet, cucumber, squash, and corn, as well as some sunflowers at various stages of growth. We also included a baby apple tree. This tree was 1 ½ years old, and we had started it from an apple seed at home. The apple seed itself came from an apple we had eaten for a snack. On a side note, this is an activity I would recommend because it has been a great learning experience. A year and a half later we are still watching changes from this tiny seed.
Anyway, for this class activity we also included tiny labeled Ziploc bags with seeds in them so the children could see and feel the difference between carrot, beet, cucumber, squash, corn, and apple seeds. These are just seeds I had on hand, but there are so many others that can be used. The idea rolled successfully forward from there. Another interesting side note that could be tried in the classroom, or at home involves green onion and/or lettuce. These 2 items can be grown from the leftover ends. Just drop the leftover end of the green onion into a glass of water with the root down. Use just enough water to cover the roots, and change the water every couple days. The process takes just over a week. For the lettuce, the process is similar, but don’t cover the lettuce. The bottom of the lettuce just needs to sit in water.
With any of these planting experiments a learning plan can be created that is age appropriate and enjoyable for the children. My son’s teacher created an age appropriate lesson plan for the class. Part of that plan included the creation of a booklet on how plants grow. The children were tasked with colouring and cutting out a specified number of pictures that broke down the stages of growth from a seed to a plant. Once cut out the children then pasted them inside their own booklets in numerical order, and printed their name on their book. The booklet was completed by answering a challenging question: What do plants need? Dirt, sun, water, and air.
Unfortunately, I was unable to be attend school for the presentation, but I was assured that it was a hit.
Supplies:

- Keurig Cups, washed out. These are great for starting a seed in, especially in a classroom environment because they are small and they have a drainage hole punched in the bottom.
- Apple Sauce Containers, washed out. These make great water trays for the Keurig cups to sit in.
- Soil. The Dollar Store sometimes carries small bags of soil during the planting season. These small bag sizes are a great size for this type of activity.
- Seeds. Whatever kind of seed you choose. I find sunflowers are great because they grow so easily. I can remember feeding them to my pet hamster as a child, and finding the uneaten seeds growing in the hamster bedding!
- Stickers. Depending on age, stickers are a great way to decorate Keurig Cups, and add a craft component to the activity.
- Acrylic Paint. Again, if you are looking to add more of a craft component to the activity, acrylic paint is great for decorating the apple sauce container.
- Optional: As an added learning component plant seedlings can be included, and/or plants at various stages of growth. Label the containers with the type of plant, and the stage of growth.
- Optional: As an added learning component different seeds can be placed in little plastic bags to show the variations in the plant seeds themselves. Label the plastic bags. Depending on the age range of the children, it can be a sensory component (sight and touch).
Addition Planting & Growing Experiments: I recommend fast growing seeds for these experiments. For example, at home we are currently trying experiment 3 with grass seeds and chia seeds.
- Plant 3 of the same type of seed, and care for them the same way with the exception of lighting. Place each seed in a different light setting: full sun, part sun, and shade. Children can note the plant’s growth progress in each light setting.
- Plant the same type of seed in different mediums: soil, cotton balls, coffee grinds, water, saw dust, sand, and etcetera. See which thrives. Again children can makes notes.
- Plant in sponges. Cut sponges into fun shapes. Place the sponges into a dish of shallow water, press seeds into the sponge and place into a sunny window. Keep the sponges moist. The second option with sponges is to place the wet seed filled sponge into a clear air filled bag and hang it in a sunny window. Children can again observe and take notes.
Plant, grow, and have fun!
By Shari Marshall – 2016

